Note: This applies specifically to my Windows 1o workflow. It will not hold a lot of relevance to any other OS. See the end for links to resources mentioned.
The main reason for sharing how I have been working is because of the seemingly long time to come up with a working set up steps.
I spent quite a while trying to learn git on the command shell a few years ago. I think I managed to learn the minimum basics at least. Just cloning repositories and staging/committing file back to a repository. That’s about it (I used an interactive tutorial on GitHub but I’m not sure it’s still there. I think this this one:
https://learngitbranching.js.org/).
Actually before VS Code was really a thing I found this HTML-oriented editor on Microsoft’s site and managed to force it to talk to GitHub even though such integration was even really a thing with that program. Good times.
Since I was taking those JavaScript courses I wanted to work on the latest versions on various different PCs. So manage a repository of source code in other words. So why not utilize git and GitHub?
When I last learned git several years ago I had come across a front end shell extension called TortoiseGit to make git easier.
Sidebar: git and TortoiseGit were once the only way to even download the ROM manager and front end HyperSpin. No idea if that program is even maintained any more. But it’s the only reason I ever heard of TortoiseGit, so thanks HyperSpin.
For my actual workflow lets use one of my own repositories as an example: advib.
First I would start by creating the folder I want to store the repository in (I created a subfolder in “documents” called “repos” to store all my repositories – that just happened to work for me).
Then, on the advib GitHub page, I clicked the green “clone or download” button and used the convenient clipboard icon (kind of confusing, no?) to copy the repository URL to my clipboard.

I right-clicked in this repos folder and selected “git clone…” from the context menu. This brings up a TortoiseGit window with the repository URL already filled in for me along with the location where I want to store it with a subfolder the name of the repository:
C:\users\tildes\documents\repos\advib
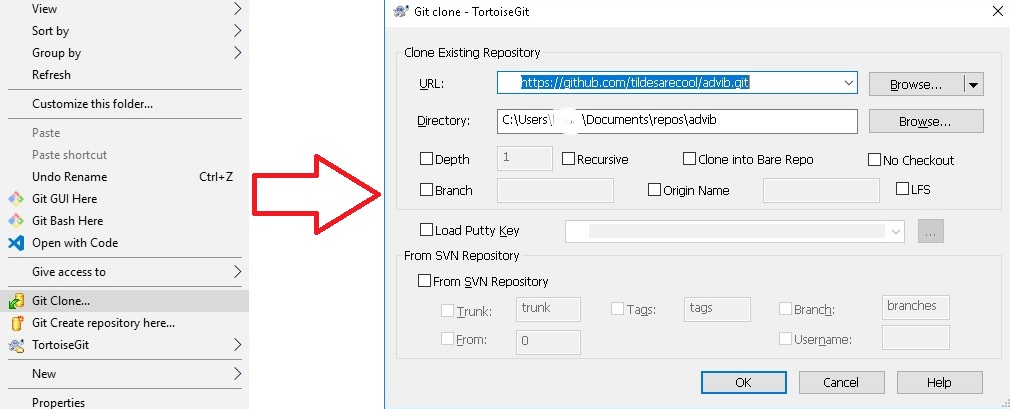
Then all I have to do this click OK and it downloads it for me. I would have to put in my GitHub credentials if this was the first time cloning a repository like this of course, but these are the steps.
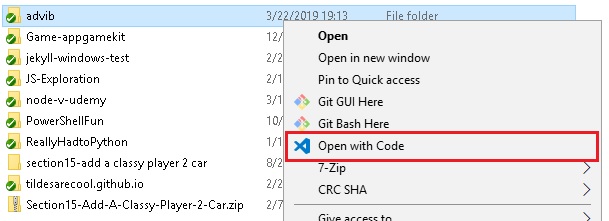
Once the clone is on my hard drive, I right click my newly created advib folder and select Open with Code from the context menu. This opens directory structure with access to all the files stored there.
I have installed the combination of git, TortoiseGit and VS Code so many times I actually don’t remember if the the GitHub VS Code extension is required or not. I don’t think it is. In any case, with the “source control” button on the left side of VS Code I can simply stage/commit my changes then push the changes up to GitHub when ready. This way I have the up to date repository stored locally and existing on GitHub. And since I clone various repositories on many different PCs this means I have redundant albeit probably outdated backups of the various repositories.

Of course in theory I could use TortoiseGit to “pull” the latest version of the repositories. But I prefer to use VS Code. Just have to remember to do a “pull” before I start a new session so I don’t end up with conflicts in repository. If I knew more of git I would be able to fix that of course. But I never bothered to learn it.
Sites and resources mentioned in this entry:
- Git for Windows – https://git-scm.com/downloads
- TortoiseGit – https://tortoisegit.org/
- VS Code (Windows) – https://code.visualstudio.com/
- advib code repo on github – https://github.com/tildesarecool/advib
- “Learn by doing” git guide – http://try.github.io/
